Wednesday, July 16, 2014

:: Let's Talk Zucchini : The Good the Bad & the Ugly ::

Since my last post, the garden has doubled in size (unfortunately, so have the weeds)!
It's just the beginning of "pickin" season and so far we are enjoying snap peas, cucumbers, and lots and lots of zucchini. Today, let's talk about the latter.

I only put two plants in to start this year and the reason being; squash bugs. Ugh, these things are like the garden devil. I fought with them last year and they've made their presences once again.


They look like a "stink bug" on steroids. They are ugly and will wilt your zucchini plant almost over night.


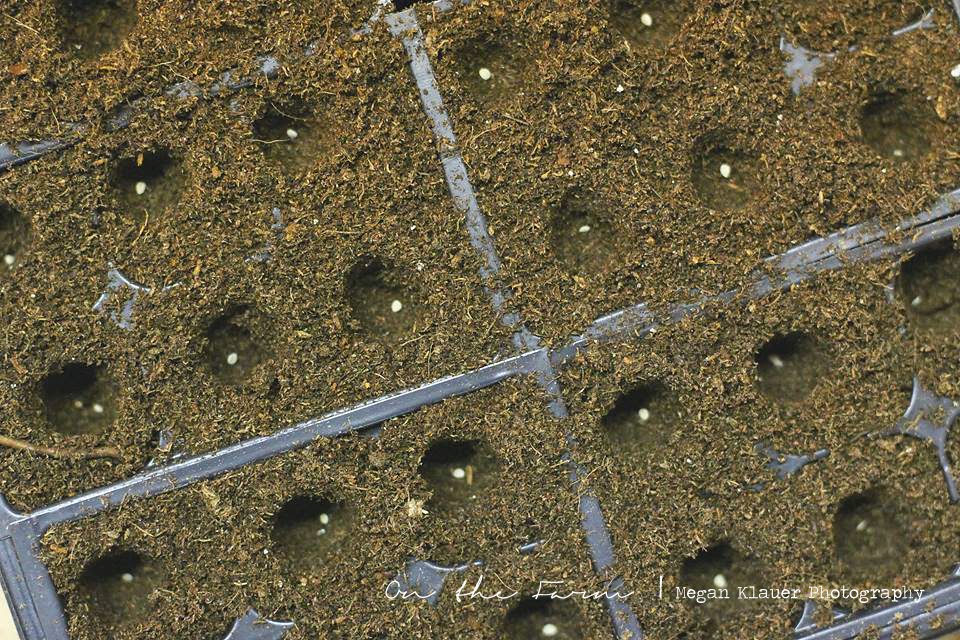
You'll find their little rows of eggs on the under side of the leaves like this : 

Last year, I found Bayer Advanced Veg Spray worked great to get rid of these pest, but I prefer to only use it on veggies that we won't be eating, such as pumpkins.
A few suggestions that seem to be silly but work: when you see the little pests, burn them with a lighter. Yes, I would be the crazy lady out in my garden burning bugs with a lighter. LOL!
Another suggestion I found that works brilliantly, using a strong tape such as duct tape to remove all the eggs from the leaf without damaging the plant.  Throw them things in the burn barrel and say good-bye!

So, we've covered the bad & the ugly; let's cover the good!
Most summer night suppers around here include zucchini. Often, cooked in the cast iron skillet with onion flakes & garlic salt, but sometimes directly on the grill. For my husband and I, it's such a treat; for our kids, they prefer it in bread form. (well, so do I.)

So, how do we turn these giant green veggies into yummy bread? Here's how:
Wash, cut and shred the zucchini with skins left on. You can use a cheese shredder if you don't have a food processor.

 If I'm going to make bread, I try to make at least 4-5 loaves at a time since there's a mess going anyways. If you have a few extra loaves, wrap them up good and pop them into the freezer for a later date. But, you can also freeze the shredded zucchini! It's so awesome to be able to pull out the shredded zucchini and bake a wonderful treat on a cold winter day!

 :: Zucchini Bread ::
3 eggs, 2 c. sugar, 1 c. veg oil, 1 tsp. vanilla, 2 c. shredded zucchini
Cream the first four ingredients and then stir in the zucchini.
3 c. flour, 1 tsp. salt, 1 tsp. baking soda, 1/4 tsp. baking powder, 2-3 tsp. cinnamon, and 1/2 c. nuts (optional)
Mix together all dry ingredients listed above and then incorporate into the wet mixture from step one.
Pour into 2 bread pans and bake at 350 degrees for 45-50 minutes.

What to do with the rest?
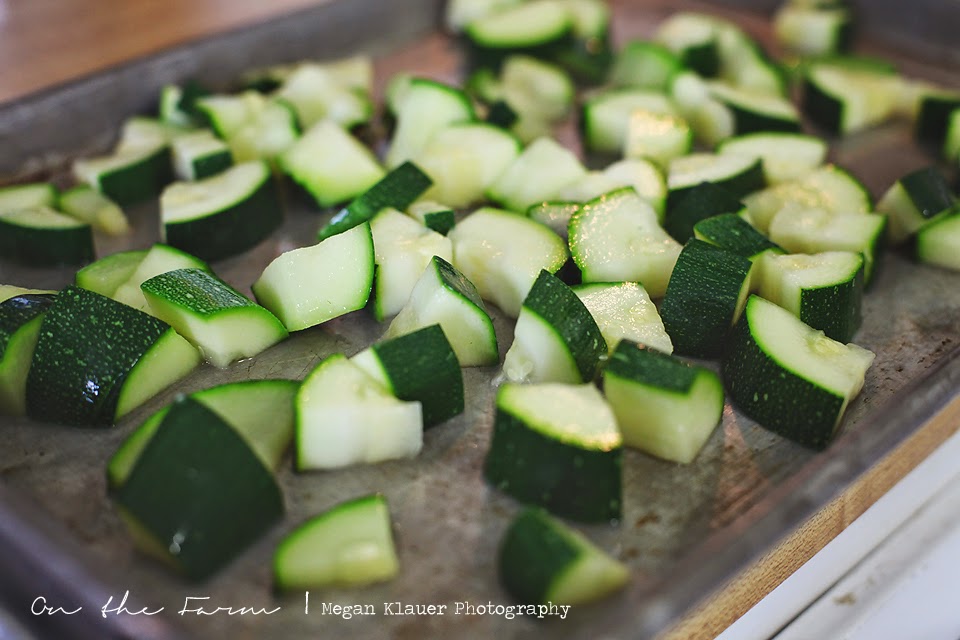
We opt to cut it into chunks, blanch it, and freeze for later use. 
Start by cleaning and cutting it into chunks ( our youngest son loves to help in the kitchen which is great because a second pair of hands definitely makes things quicker)...
We then submerge the zucchini into a boiling pot of water for only 1-2 minutes. (This is the blanching part.)
Have a bowl of ice water in the sink ready to go next. The cold water stops the cooking process so COLD is important.
 I have found putting the zucchini into a strainer and then dip that into the ice water works so much faster than trying to separate the ice cubes out in the next step.
I then lay the blanched zucchini onto a baking sheet to pop into the freezer for a few minutes. This just helps keep the pieces from becoming one big chunk in the freezer bag.
The last step, measure out the blanched zucchini into freezer bags & freeze for later use!

Got a favorite zucchini recipe you'd be willing to share? I'd love to give it a try!

Thursday, June 26, 2014

In the Garden :: What's Growing

The potatoes have taken off, so much so that I can't get between the rows to hill them anymore. Hopefully they are growing just as well under the dirt.
The tomatoes I started from seed are doing well. I can't wait to be able to add a slice of tomato to every meal. LOL!
The peppers are beginning to hold their own enough to where I can start taking off the support tiles.
The peppers are starting to be over ran a bit by this mystery plant. It sprouted from last years seed and I'm 99% sure it's a pumpkin. We are currently working on trying to train it to grow towards the outside of the garden as to not overtake the entire pepper area.
I couldn't stand to pull it out and not let it grow. That would be just silly! 
My green beans are just not fairing so well thanks to some little critter who was feasting on half of them. Hopefully they rebound nicely.
I've got three cabbage plants thanks to a nice neighbor who shared her starts.
The cucumbers are starting to climb up the trellises Coe made for me.
I didn't get any planted last year, so I'm excited for these guys!
And the Kohlrabi is starting to get big enough to snack one. These are a great crunchy treat!


Tuesday, June 24, 2014

Bloomin ... Life on the Farm

I haven't forgotten about this new little blog of mine, I've just gotten so busy with my photography business and entertaining the kids over Summer break.
It's been hard to find the time to blog about what I love ... HOME.
There's lots of things blooming, growing, and being born!
Lot's of stories coming soon including my favorite hen returning home after being "gone" for almost two weeks and baby bunnies!!!

:: Until then, enjoy the beauty of today ::

Friday, June 13, 2014

The fairies have followed :: A Fairy Garden too!

After yesterday's post about our Gnome Garden, my MIL messaged me to say she had bought a fairy garden kit last year and hadn't had time to set it up.
She wondered if we'd like it. 
Oh my gosh, yes! This will be perfect. Ella will have one and that will keep her out of the boy's "gnome world". 
It's so super cute! 
While Ella is napping, Chase and I put it together. Again, in a metal washtub I already had planted flowers in earlier this Spring. 
 It's has an archway with gates that swing & three tiny little fairies for her to play with.
It has a little wheel barrow, a rake, a hoe, and a shovel ...
And a cute little "fairy bath" and bench ...
Such a fun activity for kids! I know Ella is going to have a ball playing with this!
Thank you Grandma!

Thursday, June 12, 2014

A Gnome Garden (a.k.a. fairy garden)

I love the craze of fairy gardens found around Pinterest, but just couldn't yet convince the boys how fun it would be to create one.
Until today ...

I found this guy at walmart for under $2.
Yes! A Gnome Garden. That's much more "manly" and something the boys could possilby be on board with. 
 Isn't he cute! We named him "Rusty".

We spent lunch surfing through Pinterest for ideas on what we would use to build him a house.
I was surprised at how excited the boys were.
I had this metal washtub already full of flowers in my flower garden so I thought it would be the pefect place for his little world.
Coe came up with the idea of using an old bird house he had built from a kit last year. It was perfect! He used a dremel tool to cut the door and he and Chase set out into our timber to find some moss. 
A little glue and it was complete!
We did a bit of "dozing" work to create an area for the house and a pathway.
Coe created a ladder for him to use and Chase was incharge of the yard area.
There are plans in the works for a hammock and a few clay mushrooms. 
I'm hoping this is something fun for them to keep adding to and keep the "we're bored" moments at bay this Summer.
Do any of you have "Fairy or Gnome" Gardens?

Wednesday, June 11, 2014

The Green House :: The First Year

 
This past February was the second year we started growing a few plants from seed.

This year we stuck to tomato and pepper plants because we found that a few plants just simply started better being directly sowed in the garden. 
We grow our seeds under lights in our basement where it's fairly warm. I don't use heat pads under the trays and have had good luck without the extra cost. I suppose it depends on your basement temperature of course.

After a few months, my little seedlings were ready to be transplanted into larger pots.
It was at this point I decided a greenhouse sure would be handy! 
Especially with the cold Spring we had I needed, a place to put all my little plants.
So, Aaron and I sat down and drew up plans. He was going to build me one!
He went to pick up the lumber and supplies and came across a kit for the Snap & Grown Hobby Greenhouse. This seemed like a much better option and it was on sale!
So, he came home with two boxes FULL of parts and a thick booklet of instructions. 
To be honest I was skeptical. I just knew it was going to blow away in the first Spring storm. 
It took him 2 nights after work just to put all the pieces together.
(It's a good thing he has way more patience than me when it comes to stuff like this.)
He then built a base for it so it stood a bit taller and had a way to anchor to the concrete we were sitting it on. 
He then built shelving for me (which also sturdied it up 100%).
He and Ella even signed it. ( I knew my sentimental side was rubbing off on him. ) LOL!
For a potting table me took an old door that was salvaged from my grandparent's house before it was tore down. This is my favorite part. I feel like while my grandma might be having a fit over the amount of dirt and dust that now covers it (she kept a dust free house), in a way she is with me every time I work at it. 
Sadly, I didn't get any photos of the close to 60 tomato plants that grew in there (I know, epic fail!)
But, I'll be sharing a some garden photos soon where 20 of them are thriving so far. 
Thank you to neighbors and friends who were willing to take a few (okay alot) of the extra plants. 
Next year, I might be brave enough to sell them at the farmer's market. 

Tuesday, June 10, 2014

Cream of Tomato Soup :: Using up last years tomato juice

Last summer we planted nearly 30 tomato plants; mainly Romas ...
We had so many tomatoes, that by the end of Summer we finally just let the chickens wonder the garden and enjoy them as well. 

My goal was to learn to can. I remember my Mom spending hours in the kitchen making tomato juice and soup to put away for later use. So, one afternoon last Summer she spent the day teaching me, just the way her Mom had taught her. 

I was happy to bring home jars of juice and soup for the winter!
The kids LOVE the soup and while we used many jars of the juice making chilli we still have an abundance left on the shelves.
 
So, one day last week we made Cream of Tomato Soup (Using Homemade Tomato Juice)
This soup is perfect on a cool rainy day like today!
Pair it with grilled cheese and it will be a hit with kids of all ages!

**Note: I wrote this recipe down in my notebook and didn't make a note of where I found it on the web. As soon as I figure that out I will reference the source.**

Cream of Tomato Soup
2/3 c. real butter (not margerine)
1/2 c. flour
6 c. tomato juice
1/2 tsp. baking soda
4-5 c. milk
2 tsp. sugar
2 tsp. salt 

1. In a large sauce pan, melt butter over med. heat. Then wisk flour until smooth.
2. Add tomato juice until it thickens.
3. Whisk in soda, 4 c. milk, sugar, & salt. Cook until heated through. If you want creamier soup, add more milk. 
Notes: I used whole milk and actually added more salt to taste.